灌溉梦想,记录脚步

how-to activate SSH in ESXi

When you firs install ESXi Server (the installable version), by default the service ssh is desactivated. Tech Support
Mode provides a command-line interface that can be used to diagnose and repair ESX Server 3i hosts. But it is possible very
easy to activate SSH. Here is how:
Requirements:
You have to have direct access to console
1.) While you are at the console hit ALT + F1
2.) Type in ” unsupported ” and hit Enter
3.) Go ahead and type the root password
4.) Go and edit the /etc/inetd.conf file
5.) Uncoment the line where you can see “#ssh” (line 32). Remove the “#” mark at the begining.
6.) Type “ps -a |grep inetd”
7.) Kill the process
8.) start inetd
Remarque: In case that this don’t work. It means that when you type ”
unsupported ” nothing happens, you’ll have to follow this:
1.) Open the VI client, click onto the ESXi server you want to manage and go to Configuration TAB
Remarque: In case that this don’t work. It means that when you type ” unsupported ” nothing happens, you’ll have to follow this:
1.) Open the VI client, click onto the ESXi server you want to manage and go to Configuration TAB
f03c0882af09623ac2a3aa2687f58be4

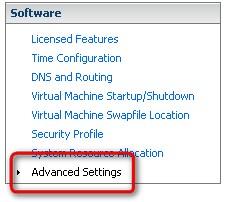
2.) Advanced Settings
zrtn-002p59ed9217-tn

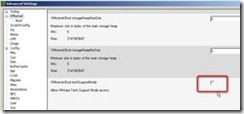
3.) Uncheck the VMkernel.boot.techSupportMode
zrtn-003p79333e39-tn

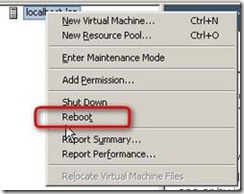
4.) Reboot the ESXi Server. Before restarting the host, you should shut down virtual machines on that host


zrtn-004p752390d9-tn

xenserver通过pxe安装centos遇到的问题

我的pxe服务器是按照esxi定制的,在XenServer上通过pxe安装centos时候出现提示无法找到硬盘。在网上查询,找到这个方法:
(这是个kisckstart脚本)
install
nfs –server=10.10.232.40 –dir=/Installation/Rhel-4.1
lang en_US.UTF-8
langsupport –default=en_US.UTF-8 en_US.UTF-8
network –device eth0 –bootproto dhcp –hostname red
rootpw –iscrypted $1$f91AzQH/$befDzE/yrgmekEW8Gbz/S1
firewall –disabled
selinux –disabled
authconfig –enableshadow –enablemd5
timezone Asia/Calcutta
bootloader –location=mbr –append="console=ttyS0 rhgb quiet"
#即手动配置分区内容。
# The following is the partition information you requested
# Note that any partitions you deleted are not expressed
# here so unless you clear all partitions first, this is
# not guaranteed to work
# clearpart –all –drives=sda
# part /boot –fstype "ext3" –size=100 –ondisk=sda
# part pv.2 –size=0 –grow –ondisk=sda
# volgroup VolGroup00 –pesize=32768 pv.2
# logvol swap –fstype swap –name=LogVol01 –vgname=VolGroup00 –size=272 –grow –maxsize=544
# logvol / –fstype ext3 –name=LogVol00 –vgname=VolGroup00 –size=1024 –grow

%packages
@ admin-tools
@ gnome-desktop
@ dialup
@ compat-arch-support
@ base-x
@ server-cfg
kernel
grub
e2fsprogs
lvm2

%post

但这样处理后,每次安装都需要交互,并不爽,经测试,把上面的粗体替换为下列内容后,完美解决。
bootloader –location=mbr –driveorder=hda
clearpart –all –drives=hda –initlabel
part swap –size 4096 –asprimary –ondisk=hda
part / –fstype ext3 –size 1 –grow –asprimary –ondisk=hda

xenserver虚拟机启动问题

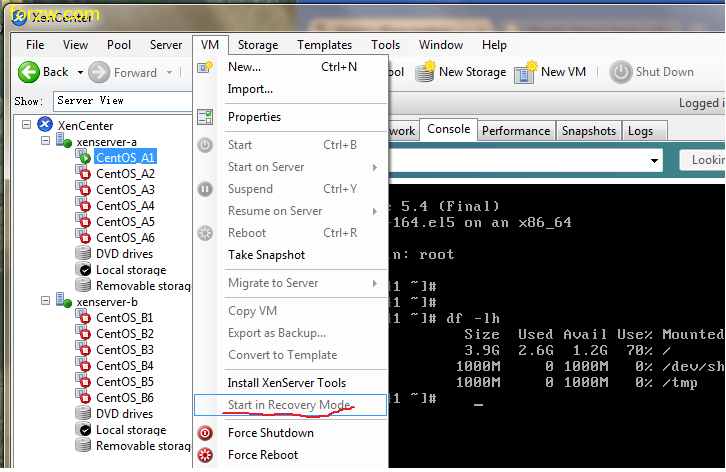
在没有可以用来引导的媒介情况下,XenServer下的虚拟机是无法正常启动的,可以通过修复模式启动,如下图:

为xenserver管理端口添加vlan标记

XenServer的网络接口可以当做交换机的的trunk口使用,即XenServer所虚拟出的系统可以属于多个vlan,在XenServer初始安装好后可以通过以下方法实现。
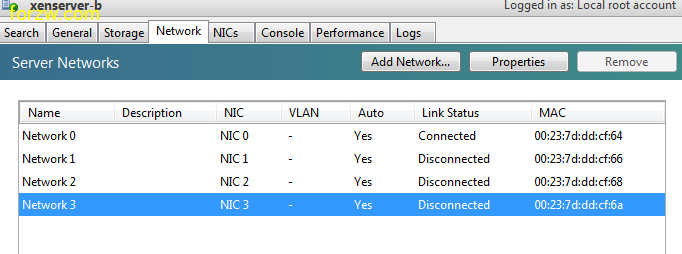
一、查看接口,这里看到我只使用接口0。

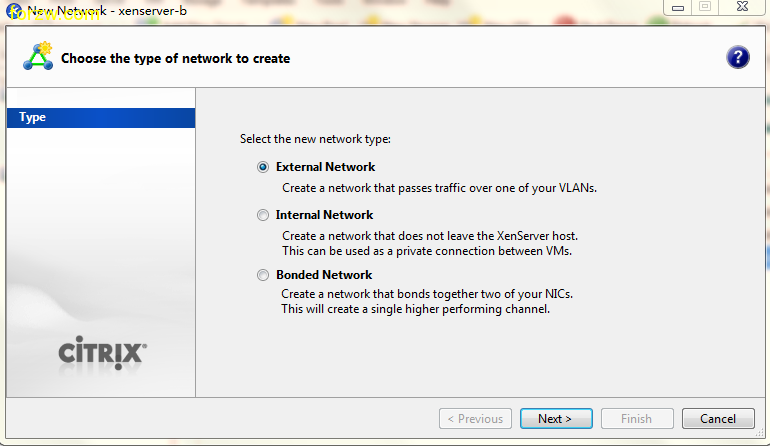
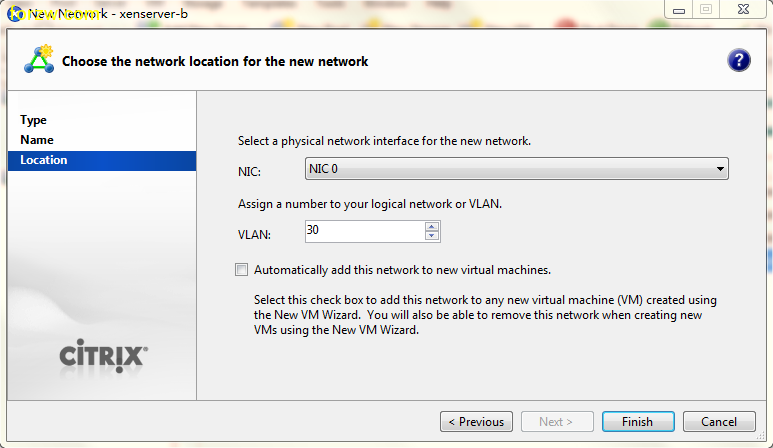
二、单击添加,弹出以下向导,选择扩展网络。

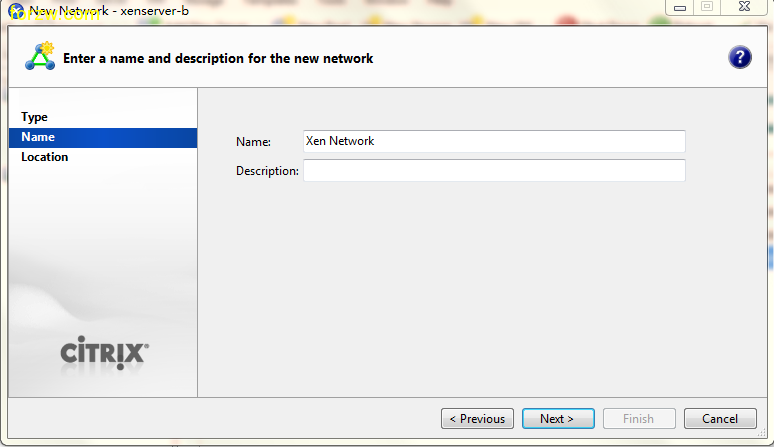
三、随便写个容易辨别的名称。

四、选择已经连接网口,并写上你所使用的vlan。

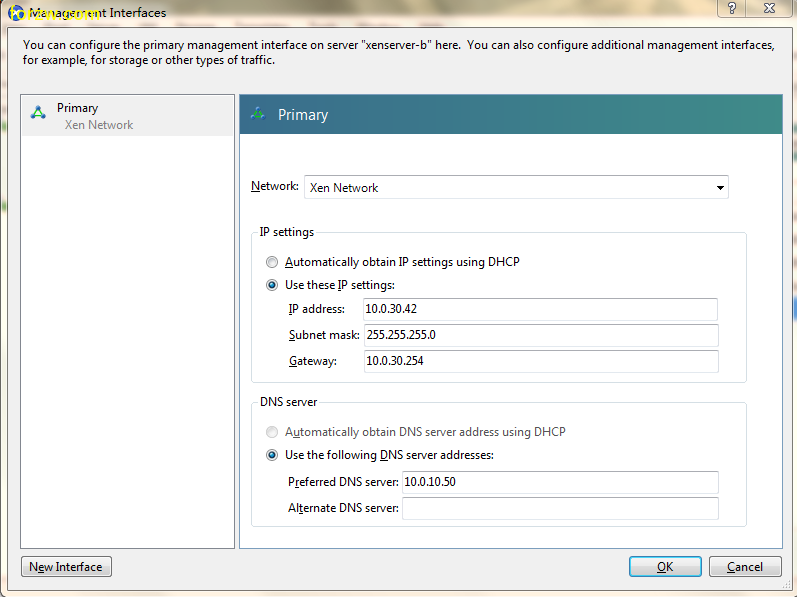
五、配置你的接口地址信息。

六、更改XenServer所连接交换机的配置,进入XenServer所在接口,更改端口类型为trunk,并设置允许通过的vlan,这里选择了全部

千兆网线线序

  千兆5类或超5类双绞线的形式与百兆网线的形式相同,也分为直通和交叉两种。直通网线与我们平时所使用的没有什么差别,都是一一对应的。但是传统的百兆网络只用到4 根线缆来传输,而千兆网络要用到8 根来传输,所以千兆交叉网线的制作与百兆不同,制作方法如下:1对3,2对6,3对1,4对7,5对8,6对2,7对4,8对5
  例如:
  一端为:半橙、橙,半绿、兰,半兰、绿,半棕、棕;
  另一端:半绿、绿,半橙、半棕、棕,橙,兰,半兰

serv-u最新注册码

  serv-u最新注册码
  注册码:s0etK1+tklL+1jT+Lx4FIhL3eVHAOB+vbeBoEROE20epLX/fYhT81ie9TmxqTmuZWQK0XXbBB
  YEdYnb2pCTMWCvI+zyWt0GNSmxFWn+WED3uVnrb
  注册码:9dK4g4iPhvOsoEY9nprEiSsmW7OUqFaGuwHT1CtBn9K6hQVg0bd2
  okQ9ldel+1IGE9b4xDP0q2W+vE4vgZLA7unm6t3CxTI
  注册码: (7.0.02)s0etK1+tklL+1jT+Lx4………

linux主机常用监控脚本

  1、查看主机网卡流量
  #!/bin/bash
  #network
  #Mike.Xu
  while : ; do
  time='date +%m"-"%d" "%k":"%M'
  day='date +%m"-"%d'
  rx_before='ifconfig eth0|sed -n "8"p|awk '{print $2}'|cut -c7-'
  tx_before='ifconfig eth0|sed -n "8"p|awk '{print $6}'|cut -c7-'
  sleep 2
  rx_after='ifconfig eth0|sed -n "8"p|awk '{print $2}'|cut -c7-'
  tx_after='ifconfig eth0|sed -n "8"p|awk '{print $6}'|cut -c7-'
  rx_result=$[(rx_after-rx_before)/256]
  tx_result=$[(tx_after-tx_before)/256]
  echo "$time Now_In_Speed: "$rx_result"kbps Now_OUt_Speed: "$tx_result"kbps"
  sleep 2
  done
  2、系统状况监控
  #!/bin/sh
  #systemstat.sh
  #Mike.Xu
  IP=192.168.1.227
  top -n 2| grep "Cpu" >>./temp/cpu.txt
  free -m | grep "Mem" >> ./temp/mem.txt
  df -k | grep "sda1" >> ./temp/drive_sda1.txt
  #df -k | grep sda2 >> ./temp/drive_sda2.txt
  df -k | grep "/mnt/storage_0" >> ./temp/mnt_storage_0.txt
  df -k | grep "/mnt/storage_pic" >> ./temp/mnt_storage_pic.txt
  time=`date +%m"."%d" "%k":"%M`
  connect=`netstat -na | grep "219.238.148.30:80" | wc -l`
  echo "$time $connect" >> ./temp/connect_count.txt
  3、监控主机的磁盘空间,当使用空间超过90%就通过发mail来发警告
  #!/bin/bash
  #monitor available disk space
  SPACE='df | sed -n '/ \ / $ / p' | gawk '{print $5}' | sed 's/%//'
  if [ $SPACE -ge 90 ]
  then
  fty89@163.com
  fi
  4、 监控CPU和内存的使用情况
  #!/bin/bash
  #script to capture system statistics
  OUTFILE=/home/xu/capstats.csv
  DATE='date +%m/%d/%Y'
  TIME='date +%k:%m:%s'
  TIMEOUT='uptime'
  VMOUT='vmstat 1 2'
  USERS='echo $TIMEOUT | gawk '{print $4}' '
  LOAD='echo $TIMEOUT | gawk '{print $9}' | sed "s/,//' '
  FREE='echo $VMOUT | sed -n '/[0-9]/p' | sed -n '2p' | gawk '{print $4} ' '
  IDLE='echo $VMOUT | sed -n '/[0-9]/p' | sed -n '2p' |gawk '{print $15}' '
  echo "$DATE,$TIME,$USERS,$LOAD,$FREE,$IDLE" >> $OUTFILE
  5、全方位监控主机
  #!/bin/bash
  # check_xu.sh
  # 0 * * * * /home/check_xu.sh
  DAT="`date +%Y%m%d`"
  HOUR="`date +%H`"
  DIR="/home/oslog/host_${DAT}/${HOUR}"
  DELAY=60
  COUNT=60
  # whether the responsible directory exist
  if ! test -d ${DIR}
  then
  /bin/mkdir -p ${DIR}
  fi
  # general check
  export TERM=linux
  /usr/bin/top -b -d ${DELAY} -n ${COUNT} > ${DIR}/top_${DAT}.log 2>&1 &
  # cpu check
  /usr/bin/sar -u ${DELAY} ${COUNT} > ${DIR}/cpu_${DAT}.log 2>&1 &
  #/usr/bin/mpstat -P 0 ${DELAY} ${COUNT} > ${DIR}/cpu_0_${DAT}.log 2>&1 &
  #/usr/bin/mpstat -P 1 ${DELAY} ${COUNT} > ${DIR}/cpu_1_${DAT}.log 2>&1 &
  # memory check
  /usr/bin/vmstat ${DELAY} ${COUNT} > ${DIR}/vmstat_${DAT}.log 2>&1 &
  # I/O check
  /usr/bin/iostat ${DELAY} ${COUNT} > ${DIR}/iostat_${DAT}.log 2>&1 &
  # network check
  /usr/bin/sar -n DEV ${DELAY} ${COUNT} > ${DIR}/net_${DAT}.log 2>&1 &
  #/usr/bin/sar -n EDEV ${DELAY} ${COUNT} > ${DIR}/net_edev_${DAT}.log 2>&1 &
  放在crontab里每小时自动执行:
  0 * * * * /home/check_xu.sh
  这样会在/home/oslog/host_yyyymmdd/hh目录下生成各小时cpu、内存、网络,IO的统计数据。
  如果某个时间段产生问题了,就可以去看对应的日志信息,看看当时的主机性能如何。